Hello guys, welcome back to my blog. So many of you guys have been messaging me asking how to install metal roofing on your own home, so today I am finally writing full blog on it. I did a lot of digging, read through real roofer discussions on Reddit, and also checked proper installation guides so I can give you the full, honest picture.
Learning how to install metal roofing is not super hard to understand, but it is very easy to mess up if you rush it. In this blog I will walk you through the whole process step by step, share some real quotes from roofers, and also tell you when you should just call a pro instead of doing it yourself.
Should You DIY Or Hire A Pro First
Before we get into the steps, I think it is important you ask yourself this question honestly. Not every metal roof job is same, some are simple and some are very tricky.
On r/Roofing, one roofer said, “The roof you have pictured is so simple that if your actual roof resembles it, I’d try to do real standing seam than this exposed fastener that will leak in a few years if not maintained.” So basically, a simple gable roof with straight panels is fine for a handy person, but complex roof with lots of valleys and angles is better left to a professional.
I also saw a comment on a bad installation job, where the roofer wrote, “This is a total disaster of an installation job. This roof will fail inspection immediately for this system.” My honest opinion, a badly installed metal roof is worse then no metal roof at all, so please don’t rush this decision.
Tools And Materials You Will Need
Ok now let’s get practical. Here is a simple table of what you need before you even climb up the ladder.
| Tool / Material | Why You Need It |
|---|---|
| Aviation snips / metal shears | For cutting panels and trim to size |
| Hand seamer | For folding trim tabs and edges |
| Cordless drill or screw gun | For driving self-tapping screws |
| Chalk line | For snapping straight reference lines |
| High-temp ice and water shield | For waterproofing the deck |
| Furring strips / battens | For airflow and drainage under panels |
| Butyl tape | For sealing seams and overlaps |
| Metal roofing panels + trim | The actual roofing material |
| Gasketed screws | For fastening panels without leaks |
| Fall protection harness | For your own safety, please don’t skip this |
As per Family Handyman, you also need basic carpentry tools on hand, and honestly I agree, most of these tools you probably already have if you do any DIY work at home.
Step By Step: How To Install Metal Roofing
Now let’s get to main part, the actual steps of how to install metal roofing on your house. I combined what real roofers on Reddit said along with proper installation guides so you get the full picture.
Step 1: Remove The Old Roofing
Unless you are using battens over existing shingles, most pros recommend you tear off old roofing first. This lets you check the deck underneath and make sure everything is solid before you build on top of it. A Redditor on r/HomeImprovement admitted, “Demo of the old roof is the hardest, I started hiring a crew to do that part.” I think this is honest advice, demo is hard, dirty work and hiring help for just this part is not a bad idea.
Step 2: Install High-Temp Ice And Water Shield
This step protects your roof deck from moisture before the metal even goes on. On r/Roofing, one roofer said, “‘High Temp’ ice and water shield. Should say HT on the box/wrapper. If the sun ever shines where your home is…..use HT IWS.” According to Family Handyman, the underlayment layers should overlap by 6 to 8 inches so water always flows over the seam, not into it.
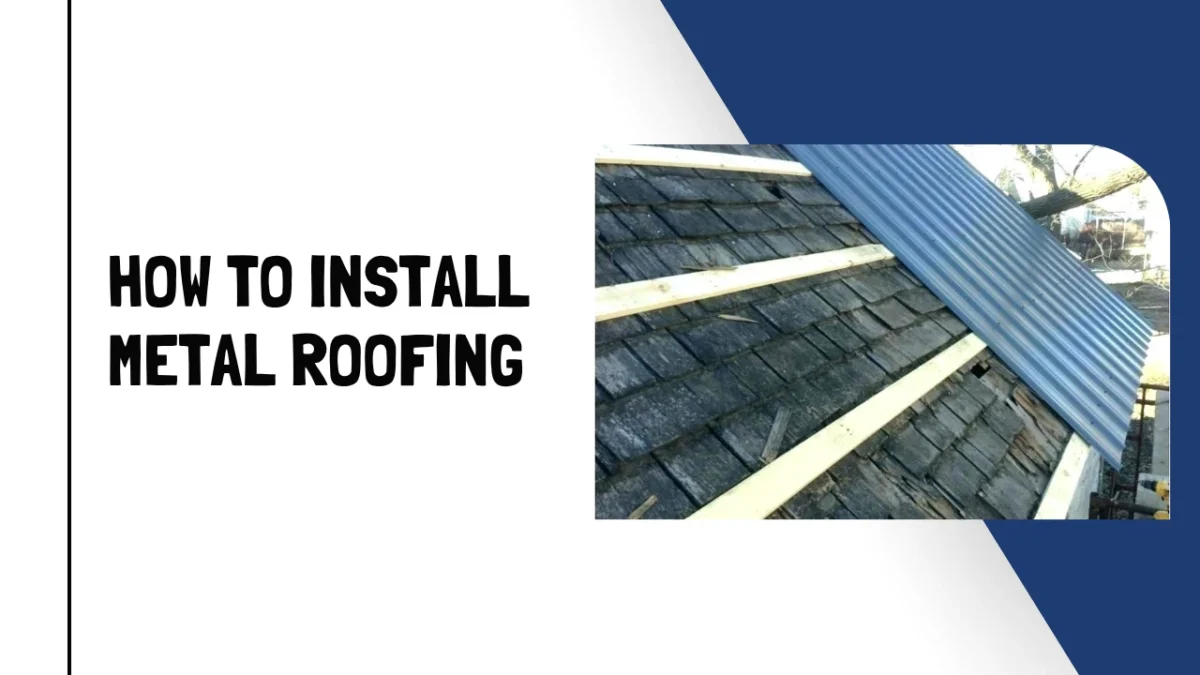
Step 3: Add Furring Strips Or Battens
This one part is often skipped by beginners but it is very important. Battens create a small gap between the metal and the deck for airflow and drainage. A Redditor explained it well, “Furring strips are crucial for metal roof installations to ensure proper ventilation, drainage, and energy efficiency.” Also, install them vertical, not horizontal. As another comment said, “Battens vertical helps with airflow. It also ensures if a leak happens the water can flow freely and not dam up at the batten when placed horizontally.”
Step 4: Snap A Reference Line And Set Trim
Before setting panels, snap a straight chalk line so your first panel is perfectly square to the eave. Then install your eave trim and drip edge, this small metal strip protects your fascia board and sends water away from your house instead of behind it.
Step 5: Set And Fasten The Panels
Now the main event. Place your first panel with a little overhang at the eave, and start driving screws. This is where a lot of people mess up, so pay attention here.
As per McElroy Metal, you should never over-drive or under-drive your screws. Over-driving makes a dimple that lets water pool, and under-driving leaves gaps where water gets in under the washer. Also keep every screw straight, not angled, in nice consistent lines.
On screw spacing, per Inspectapedia, different manufacturers ask for anywhere around 75 to 80 screws per square of roofing, but you should always check the exact fastener schedule from whatever brand of panel you bought, because it changes with wind zone in your area.
One thing to note too, gasketed screws don’t last forever. A roofer mentioned, “With standing seem you can get away with no visible fasteners if you have short runs. But in most metal roofs the neoprene screws are recommended to be changed every 8-10 years which would suck.” So keep this in mind for future maintenance too.
Step 6: Overlap Panels The Right Way
Panels need to lap in the correct direction, or you are basically building a water slide straight into your house. On r/Carpentry, someone reviewing a bad job wrote, “The panels are lapped backwards, they are too short, there is no drip edge, and probably no neoprene closure strip under the panels at the bottom.” This comment alone tells you everything that can go wrong if you don’t pay attention.
Step 7: Seal Seams With Butyl Tape
Apply butyl tape along panel seams and overlaps, especially if your roof has low pitch or gets a lot of wind driven rain. This little step adds a big extra layer of protection against leaks.
Step 8: Finish With Ridge Cap And Flashing
Last step, install your ridge cap at the very top, along with any flashing around chimneys, vents, or walls. As per Today’s Homeowner, attention to panel overlap, fastener torque, and flashing is what really decides if your roof stays leak-free for years.
Roof Installation Steps At A Glance
| Step | What You Do |
|---|---|
| 1 | Remove old roofing and inspect deck |
| 2 | Install high-temp ice and water shield |
| 3 | Add vertical furring strips / battens |
| 4 | Snap reference line, install eave trim and drip edge |
| 5 | Set panels and drive screws correctly |
| 6 | Overlap panels in correct direction |
| 7 | Seal seams with butyl tape |
| 8 | Install ridge cap and flashing |
Quick Facts Table
| Fact | Detail |
|---|---|
| Average installed cost | $7–$16 per sq. ft. depending on panel type |
| Typical DIY difficulty | Advanced for standing seam, moderate for simple gable |
| Underlayment overlap | 6–8 inches between layers |
| Screws needed | Roughly 75–80 per square (check manufacturer) |
| Neoprene washer lifespan | Replace every 8–10 years |
| OSHA fall protection rule | Required at 6 feet or higher |
Source: Western States Metal Roofing, Inspectapedia, OSHA
Please Don’t Skip Roof Safety
I want to add this part because honestly, most DIY roof injuries happen because people don’t think about safety till its too late. As per OSHA, employees working six feet or more above the ground must use guardrails, safety nets, or a personal fall arrest system. I think this rule is good sense for homeowners too, not just workers. A roof gets slippery fast, especially metal, so always use proper harness, good shoes, and never work alone up there.
Common Mistakes People Make
I read through a lot of Reddit threads for this blog, and honestly, the same mistakes kept coming up again and again. Here is a quick list so you don’t repeat them.
| Mistake | Why It’s A Problem |
|---|---|
| No drip edge installed | Water gets behind fascia and rots wood |
| Panels lapped backwards | Water flows into the seam instead of over it |
| Over-driven or angled screws | Creates dimples and gaps where water leaks in |
| Horizontal battens | Water dams up instead of draining freely |
| Skipping high-temp underlayment | Regular underlayment can fail under hot metal panels |
Frequently Asked Questions
Q: Can a regular person learn how to install metal roofing themselves? A: Yes, for a simple gable roof with straight lines, a moderately handy person can do it. But complex roofs with valleys and steep pitch are safer left to a pro.
Q: What is the biggest mistake people make when learning how to install metal roofing? A: Getting the panel overlap direction wrong and skipping drip edge, both of these cause leaks very fast.
Q: Do I need to remove old shingles before installing metal roofing? A: In most cases yes, this lets you check and fix the deck underneath. Some installers do go over old shingles with battens, but it is not always the best practice.
Q: How much does it cost to install a metal roof? A: Based on current data, expect somewhere around $7 to $16 per square foot depending on panel type and labor in your area.
Q: How often do metal roof screws need to be replaced? A: Neoprene gasketed screws are usually recommended to be replaced every 8 to 10 years to keep the seal tight.
Final Words
So guys, that was my full breakdown on how to install metal roofing, from tools you need, all the way to safety and common mistakes. I have tried to keep it simple and also back it up with real roofer opinions and proper guides, not just my own thoughts. My honest advice, if your roof is simple, you can try it, but if it is complex, please don’t risk it, hire someone who knows the job. Keep on visiting Write for Us Roofing for more guides like this.
Sources
- r/Roofing – Standing seam vs exposed fastener comment (Reddit)
- r/Roofing – Disaster installation job comment (Reddit)
- r/HomeImprovement – Demo of old roof comment (Reddit)
- r/Roofing – High temp ice and water shield comment (Reddit)
- r/Roofing – Furring strips crucial comment (Reddit)
- r/Roofing – Vertical battens comment (Reddit)
- r/Roofing – Neoprene screws lifespan comment (Reddit)
- r/Carpentry – Panels lapped backwards comment (Reddit)
- Family Handyman – How to Install Metal Roofing
- Today’s Homeowner – Metal Roof Installation Guide
- McElroy Metal – Tips for Selecting and Installing Screws in Metal Roofing
- Inspectapedia – Metal Roof Fastener Spacing
- OSHA – Fall Protection in Residential Construction Fact Sheet
- Western States Metal Roofing – Metal Roof Cost Guide